Introduction
Game development is a complex process that requires careful planning and organization. One of the most critical challenges for game developers is translating creative ideas and design documents into actionable tasks that can be tracked and managed efficiently. Traditionally, this involves project managers manually breaking down Game Design Documents (GDDs) into tasks - a process that can be time-consuming, inconsistent, and prone to overlooking important details.
This guide demonstrates how to leverage modern AI tools to automate the conversion of game design documents into organized task boards. By combining the power of large language models (GitHub Copilot and Roo) with project management tools (Planka), you can:
- Save dozens of hours normally spent manually creating task lists
- Ensure consistent task breakdowns that capture all necessary development work
- Automatically organize tasks by discipline, priority, and development phase
- Create a ready-to-use project board that your entire team can start working from immediately
The workflow described below has been tested with various types of game projects and consistently produces high-quality, comprehensive task boards that accurately reflect the content of the original design document.
Requirements
Game Design Document (GDD): The foundation of any game project. Should contain information about gameplay mechanics, narrative, art style, technical requirements, and other aspects of your game. The more detailed your GDD, the more comprehensive your task breakdown will be.
VS Code: A lightweight but powerful source code editor. Free and available for Windows, macOS, and Linux from code.visualstudio.com.
GitHub Copilot: An AI pair programmer that offers code suggestions. Requires a subscription ($10/month for individuals, free for students and open source contributors). Install through the VS Code extensions marketplace.
Anthropic API key: Required for using Claude AI models through Roo. Register for an API key at console.anthropic.com.
Roo: A VS Code extension that provides access to Anthropic's Claude AI models. Install through the VS Code extensions marketplace.
Planka: An open-source project management tool similar to Trello. Can be self-hosted using Docker (instructions provided below).
Why Planka?
Planka is an excellent choice for game development teams for several reasons:
- Open Source: Unlike commercial alternatives, there are no subscription fees or user limits
- Self-hosted: Your sensitive game design data stays on your infrastructure
- Familiar Kanban Interface: Easy to learn for teams already familiar with Trello or similar tools
- Highly Customizable: Can be tailored to match your specific workflow
- Docker-based: Simple deployment and maintenance
- API Access: Can be integrated with other tools in your pipeline
Full installation instructions are available in the official Planka documentation.
Step 1: Prepare the AI Prompt
This step involves creating a detailed prompt that instructs the AI on how to process your Game Design Document. The prompt provided below is carefully structured to ensure the AI generates high-quality, actionable tasks.
Key Components of the Prompt:
- Defines the AI's role as a game development project manager
- Provides step-by-step instructions for analyzing your GDD
- Specifies the exact format for task generation
- Ensures tasks are properly categorized and labeled
You can use the prompt as provided or customize it for your specific needs. The most important sections to review are:
- The task label suggestions (you might want to modify these based on your team structure)
- The list name suggestions (these will become your columns in Planka)
You'll also need a JSON schema that defines the structure expected by Planka. Save this as json-schema.json in your project folder:
Step 2: Prepare Your Project Folder
Before proceeding, you need to set up a proper folder structure for this process:
- Create a new folder for your project with a descriptive name (e.g., "GameName-TaskGeneration")
- Inside this folder, create the following files:
GDD.md- Your Game Design Document in markdown formatjson-schema.json- The JSON schema provided above- A blank
import.jsonfile that will later contain the generated tasks
Having a clean, dedicated folder makes it easier to manage the files involved in this process and prevents confusion with existing projects.
GDD Preparation Tips
For optimal results, ensure your GDD:
- Has clear section headings (e.g., # Gameplay, # Art Style, # Technical Requirements)
- Includes detailed descriptions of mechanics, systems, and features
- Specifies target platforms and technical constraints
- Describes the art style and audio requirements
If your GDD is in another format (Word, Google Docs, etc.), convert it to markdown before proceeding. You can use online converters or simply copy and paste the content into a new markdown file, adding appropriate formatting.
Step 3: Generate the Task List Using AI
This step uses Roo with Claude AI to analyze your GDD and generate a comprehensive task list.
- Open your project folder in VS Code
- Launch VS Code
- Go to File > Open Folder and select your project folder
- Install and Configure Roo
- Open the Extensions view (
Ctrl+Shift+X) - Search for "Roo Code" and install the extension
- Click on the Roo icon in the sidebar
- Enter your Anthropic API key when prompted (you'll only need to do this once)
- Open the Extensions view (
- Prepare Your AI Request
- Open your GDD.md file in the editor
- Open the Roo sidebar and switch to "Architect" mode using the dropdown
- Paste the prompt from Step 1 into the input field
- Add a note at the end: "The following is my Game Design Document:" followed by the complete content of your GDD
- Execute the AI Task
- Click "Run" or press Ctrl+Enter
- Wait for the process to complete (this may take several minutes depending on the size of your GDD)
- Review the Generated Output
- Roo will generate a response containing:
- A high-level development plan with phases and milestones
- A detailed feature list organized by category
- A JSON code block containing all the tasks
- Verify that the development plan and feature list accurately reflect your GDD
- Check that the JSON structure includes the required fields (name, desc, listName, labels)
- Roo will generate a response containing:
- Extract the JSON Data
- Copy the JSON code block (including only the valid JSON, not the surrounding markdown)
- Paste it into your blank import.json file
- Save the file
Step 4: Format the JSON for Planka Import
In this step, we'll use GitHub Copilot to transform the AI-generated JSON into the format required by Planka.
- Prepare GitHub Copilot
- Ensure you're signed in to GitHub Copilot in VS Code
- Open the Command Palette (Ctrl+Shift+P)
- Type "Chat: Open Chat" and select it
- Set Up the Conversion Task
- Make sure both your json-schema.json and import.json files are open in the editor
- In the Copilot Chat panel, set it to "Agent" mode
- Enter the following prompt:
Click to expand prompt
I need to convert the task list in import.json to match the schema in json-schema.json. The import.json currently has a "cards" array with tasks, but the schema requires a more complex structure. Please transform the JSON to be fully compliant with the schema while preserving all task data.- Execute and Validate the Conversion
- Let GitHub Copilot process the request and generate the transformed JSON
- Review the output to ensure it conforms to the schema
- Save the updated content to your import.json file
- Validate the JSON structure using an online JSON validator or VS Code's built-in validation
Common JSON Format Issues and Solutions
- Issue: Missing required fields in the schema
- Solution: Copilot will add placeholder values for required fields
- Issue: Incompatible data types
- Solution: Ensure strings are properly quoted and arrays use square brackets
- Issue: Extra fields not in the schema
- Solution: These will be preserved but won't affect Planka's functionality
Step 5: Set Up and Import into Planka
Planka is a self-hosted project management tool that we'll use to visualize and manage the tasks.
Prerequisites
- Docker and Docker Compose installed on your system
- Basic familiarity with terminal/command line
- Port 1337 available on your system
Setting Up Planka
- Create a Docker Compose File
- Create a file named
docker-compose.ymlin your project folder - Copy the following configuration (adjust as needed):
- Create a file named
Click to expand Docker Compose configuration
```yaml services: planka: image: ghcr.io/plankanban/planka:latest restart: on-failure volumes: - user-avatars:/app/public/user-avatars - project-background-images:/app/public/project-background-images - attachments:/app/private/attachments ports: - 1337:1337 environment: - BASE_URL=https://planka.example.com # Change this to your domain name - DATABASE_URL=postgresql://postgres@postgres/planka - SECRET_KEY=strongsecretkey # Change this to a strong secret key - DEFAULT_ADMIN_EMAIL=changeme@example.com # Do not remove if you want to prevent this user from being edited/deleted - DEFAULT_ADMIN_PASSWORD=strongpassword - DEFAULT_ADMIN_NAME=Admin User - DEFAULT_ADMIN_USERNAME=adminuserdepends_on:
postgres:
condition: service_healthy
postgres:
image: postgres:16-alpine
restart: on-failure
volumes:
- db-data:/var/lib/postgresql/data
environment:
- POSTGRES_DB=planka
- POSTGRES_HOST_AUTH_METHOD=trust
healthcheck:
test: ["CMD-SHELL", "pg_isready -U postgres -d planka"]
interval: 10s
timeout: 5s
retries: 5
volumes:
user-avatars:
project-background-images:
attachments:
db-data:
</details>- Launch Planka
- Open a terminal in your project folder
- Run the command:
docker compose up -d - Wait for the containers to start (this may take a minute or two)
- Access Planka by opening a browser and navigating to
http://localhost:1337
- Initial Configuration
- Register with the admin credentials specified in your docker-compose.yml
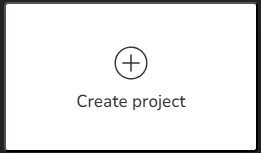
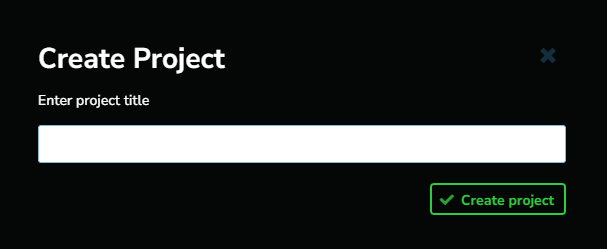
- Create a new Project with a name matching your game
Importing Your Tasks
- Prepare for Import
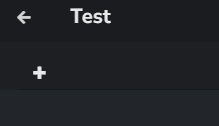
- In Planka, navigate to your project
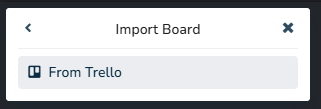
- Click on the board menu (+ button) in the top left
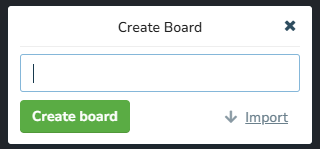
- Select "Import", be sure to name it ![[Planka Create Board 2.png]]
- Choose "From Trello" as the import format ![[Planka Import Board.png]]
- Import the JSON File
- Click "Choose File" and select your prepared import.json file
- Click "Import" and wait for the process to complete
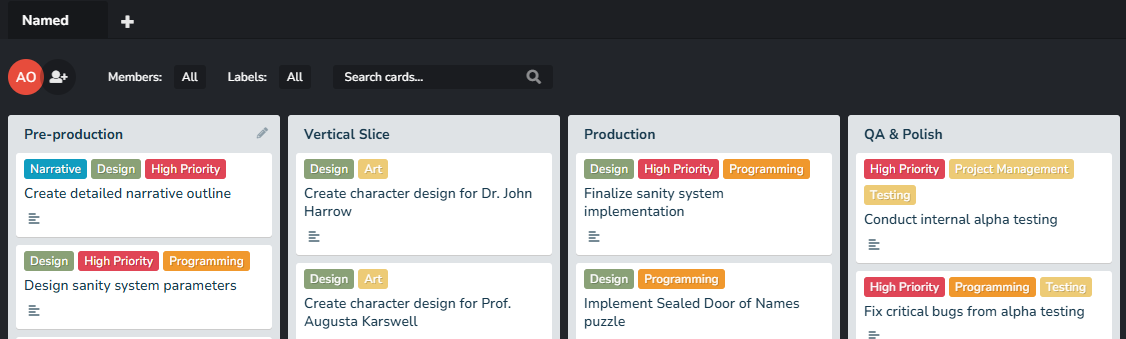
- Planka will create all the lists, cards, and labels defined in your JSON
- Verify the Import
- Check that all tasks appear correctly
- Verify that labels are assigned properly
- Ensure task descriptions contain the detailed information from the AI
Troubleshooting and Common Issues
AI Generation Issues
- Issue: AI generates incomplete or inaccurate tasks
- Solution: Revise your GDD to be more specific, then run the AI process again
- Issue: JSON formatting errors in AI output
- Solution: Use a JSON validator to identify and fix syntax errors
JSON Conversion Issues
- Issue: GitHub Copilot doesn't properly format the JSON
- Solution: Manually edit the most critical fields (cards, lists, labels) based on the schema
Planka Setup Issues
- Issue: Docker containers fail to start
- Solution: Check Docker logs with
docker compose logsand ensure ports aren't in use
- Solution: Check Docker logs with
- Issue: Import fails or crashes
- Solution: Try importing a smaller subset of tasks first to identify specific problematic entries
What's Next? Using Your Task Board
Now that you have successfully imported your tasks, here are some next steps:
- Organize Your Board
- Rearrange lists in a logical workflow order
- Consider adding additional lists for specific phases or teams
- Set up any additional labels needed for your team
- Assign Responsibilities
- Add team members to the Planka board
- Assign tasks to appropriate team members
- Set due dates for critical milestones
- Track Progress
- Use the board daily to monitor task status
- Move cards between lists as they progress
- Add comments to cards to document decisions or challenges
- Iterate and Refine
- Add new tasks as they emerge during development
- Update task descriptions as requirements evolve
- Archive completed tasks to maintain a clean board
Conclusion
By leveraging AI tools to convert your Game Design Document into actionable tasks, you've saved significant time and created a comprehensive project management foundation. This approach ensures nothing gets overlooked and provides your team with clear direction.
As development progresses, remember that the task board is a living document. Regular reviews and updates will keep it relevant and valuable throughout your game's development lifecycle.
If you found this workflow helpful, consider exploring other ways AI can assist in game development, such as generating design variations, or creating test scenarios.